Monday, December 3, 2012

Bases Tutorial: Desert Sand


 I have talked about it for a while, so here is my tutorial on my custom Desert Sand bases. Although these were made with the round lipped bases for Warmachine, they can be used for any bases really.

These ones were custom done for a Protectorate of Menoth army I was commissioned to do a while ago, and still get some more once in a while. There is the background, lets begin!


STEP 1:: What you Need.
So here are some items you will need.
Green Stuff
Bases
Sand grit
White glue

STEP 2:: Preparing the Bases
 If you have the grove open in your bases you may want to cover that slot up. There are many options to this as seen in the picture above. You can cover the slot with basic tape. You could also clip a toothpick down to size and glue it in the slot. These are the two different methods used above. Really either way works good. Although the tape is a quick way to start getting at the bases, the toothpick provides support if you plan on pinning the model to the base down the middle.


 Green Stuff is a two part epoxy that you mix by hand, combining the yellow and blue until you get a nice green color. Remember a little bit can go a long way. Even more remember that you can always add more green stuff, but if you make too much then you better have a use for the excess.

STEP 3:: Press to Fit
Here is a wide picture of a few bases being worked on at once. Slots are covered up and green stuff is made. Now take the green stuff and press it onto the base and smear it to match up close to the top of the lip. You want to leave gaps to see the base, like in the picture. This will help separate the cracked earth appearance and the rocky earth.

STEP 4:: Making the Earth
It easier than it sounds. Let the green stuff "dry" a bit (30 min-1hr) to where you can drag your exacto blade across without dragging up green stuff. Here you can removed any unwanted excess or re-shape the ground.


STEP 5:: Adding the Grit
Once you have your desired shape, let the green stuff cure a bit longer. Not completely harden or the next part wont work properly. If it doesnt cure enough then the grit will spread into the green stuff ruining the design.
Take your white glue and spread a thin bead upon the "open" parts of the base, that is the black areas you can still see. It is ok to get glue upon the green stuff itself to blend the two bits together.
Then you press the base into you sand grit, or sand mixture. The grit should hold to the glue and put some indentations into the green stuff.  Shake off the excess and reshape your earth cracks. Let completely cure before continuing onto painting.


STEP 6: Painting 

Prime the base with your favorite primer. I use a brush-on primer to knock off any loose grit not held fast by the glue. You can kind of make out the indentations made by pressing the grit onto the base from the earlier step. All of the following colors I have used Reaper Miniatures Master Series.


 Here we painted with Khaki Shadow.

 Drybrush on top of previous layer with Faded Khaki.

 Another drybrush layer on top using Desert Khaki.
This is the highlight level so try to get only the top most parts.
You can see the indents from the grit coming more apparent here.

 And one last drybrush. This is the Extreme highlight, the top most highlight layer.
Drybrush this in scarce random areas. Sparingly, just a bit here and there. 
Color used: Desert Sand.

 All finished! Now just clean up the base (i used Pure Black) and then I marked the front arc of the model. Although you can do what you want at this point, its your miniature.


And there you have it! Desert Sand bases. Could also be dry earth or cracked earth, depending on how you paint them up and how much of the sand grit you apply.

I hope you enjoyed this tutorial and I plan on doing more at some point on the bases and other things. Off to paint again, good luck out there.

Friday, November 30, 2012

The end is near

Well here we are, the tail end of November. I thought a good time to lay out some thoughts and happenings around here. So lets take a look back to reflect on what I have set out to do vs what I have done.

First off, I am glad to say I have completed all my commission assignments for the year! Big yea to me. All goods delivered all paid for too. Super happy about this now as I can focus the last month of the year all to myself. I would have been done sooner, but I cant say no to painting stuff. Its my addiction. But by doing so also lets me paint AND make money doing it. I still have a few pics to add up here to the blog, so be on the lookout for them coming up probably next month.

Now looking back to the first post of the year, my "Resolutions post", I see I didnt really get much accomplished here. My Super Dungeon Explorer miniatures all still need to be painted, and I just received the expansion Caverns of Roxor. The Legion commission project wasnt even started due to lack of client interest, but I have them here so I should do them sometime. The Malifaux and Cygnar get done at random times as they are my own models. Same with my Cryx army, just too many other projects to do before I could paint them. Coming in the new year I think I am receiving a small Khador army for Warmachine to paint as a commission for Comic Store West, I love to paint for these guys as they are my LGS. Also need to do up the Zombicide miniatures as I run demos at LGS and painted look prettier.

As for terrain and the other bits, well I did mention it was a busy year. I did a set of desert themed bases for a Menoth army, and will post that "how to" here next week. The other types of "Cryxian" terrain also fell by the wayside as the Iron Kingdoms RPG was released and I started to focus on some story and papercraft buildings for that one. I may be running a group next year IF my work schedule becomes more permanent.

I was able to build a 3D Super Dungeon Explorer demo board for when I do demos of that game at the LGS, and I even got my hands on a second set of Terrain Clips, Buildings and Streets of Malifaux for possible use in a 3D version of Zombicide! ideas are still brewing and playtesting, but it should work nicely!

And now, soon I must make room, or look for a bigger house. I realized with all the Kickstarter hype that I will be receiving miniatures from various companies each month next year, from January until May, and then another order in November! Zombicide, Reaper Bones, Impact Chibi Dungeon Explorers, Relic Knights, and Kingdom Death! Thats gonna be a LOT of miniatures. Not to mention a Wrath of Kings Kickstarter that will start soon (I hear February), and they look interesting as well.

Now I am off to clean up my painting area and do some organizing. Hope everyone had a great holiday and more to come. Paint happy!

Tuesday, November 20, 2012

Old Witch & ScrapJack

LIVE, from Khador...its Old Witch and ScrapJack!!!

One of my favorite miniatures I wanted to paint for a while now, is the Old Witch and her jack, ScrapJack. I just never found the time to step out of Cryx to buy and paint the pair. So to my delight I received a commission to paint them! Strapping on my boots (because Khador is COLD) I dug in and painted them up last week.

In case you couldnt guess these two are for the Khador army of Warmachine from Privateer Press. I took the liberty to add some extra detail to them, and I think they look great. Enjoy these pictures!


Feels like winter just looking at them. I hope the client will be as pleased with them as I am. Ahhh the joys of painting. One of my true pleasures. Back to it!

Wrack em up!

Continuing with some commission work, here are some Protectorate of Menoth miniatures I did recently, they are used in the Warmachine game from Privateer Press. The theme is continuing with some others I did in the past, but as of yet posted up here on the blog.

Up first we have some Wracks.


And I will add the Hierophant up here as well. He is a solo for the Protectorate army, there to lend a hand to the Warcaster.


Someday I will add more of the Menoth commissions I have done, all for the same client. Also I am planning on doing a tutorial on how I did up the sand/desert theme bases. There is one more unit to finish, hopefully before Christmas and they will be up here after they are done.

Everyone have a great holiday, turkey is vastly approaching.

Wednesday, November 7, 2012

Mountain KING!!!!

Every game evolves at some point. For Warmachine and Hordes (from Privateer Press) it was the Colossals and Gargantuans expansions. Now I have my Cryx Colossal, and the Mercenary one is coming soon. This I present to you is the Trollbloods Mountain King!

The model is so beautiful, large and in charge (the figure mind you, his stats are subpar). Now as I have some Trollblood models I cannot wait to get this one in the future, this one I painted is a commission piece. I have mixed feelings about it. Before the pics I will rant abit.

I love to paint and this model is beautiful. The client wanted a fast cheap paint job. I wanted to go all in, deep detail, beautiful shading, colors, etc. But as we know, the customer is paying so they get what they want. I WILL be buying one for myself in the future to do me justice and bring it to life in my vision painted glory.

OK ENOUGH of that, here are some pics to enjoy of the Mountain King!


He is one big Mammajamma! the base is about the size of a CD (or DVD if you prefer). Over 6" tall and just pure awesome rage! The color scheme I was going for was akin to Doomsday from DC Comics.  The base is made mostly from Greenstuff and Sand Grit. As I said earlier there is SO MUCH MORE I want to do with him, but that is not what was paid for, to fufill my dreams I gotta get one of my own.

Until next time, next time...

Maelok the Dreadbound

Time for another commission piece. Maelok the Dreadbound, a warlock for the Minions army, for the Hordes side of Privateer Press. Maelock works mostly for the Gators side of things on the Minions side, and personally I like his style (I play Cryx mostly). 


He was done a while ago and I was asked to add a base. Bones litter underneath the swamp as Maelok makes his march. Again this was a quick, cheap paintjob but came out how I wanted the colors to.
Next up: One big MOFO!

Road Hog #3

And weeeeere back! Today I have 3 different commission projects to put up. I DID want to upload my 3D Dungeon "How to" build tutorial, but my phone is not connecting to the computer :(

Instead I uploaded these pics off my camera. So here is the first. Another Road Hog from Privateer Press! You may have seen his 2 brothers earlier, as this was requested from the same client. Cheap, quick paint job.


Now to go upload 2 more, ironically from the same client. I have just 1 more commission piece due the end of the month, and then back to my personal stuff! I am debating between Super Dungeon Explore of Zombicide. Or more Cryx, Pyrates, or....well you know how it goes: Too many models, not enough time.

Sunday, November 4, 2012

Zombicide Event 10/27/2012

So my computer is acting up. I am posting my first ever mobile update!

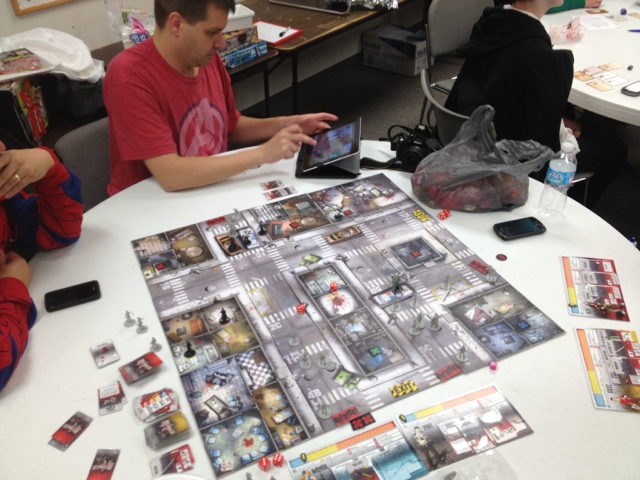
These are some pictures I took of the Zombifest Zombicide Event at Comic Store West last month. To be honest, I get caught up in the action an there should be more pictures. I ran the event for 9hrs and it was a lot of fun.

There were many people stopping by checking out the game and getting into the action. We even ran the Switch City campaign and survived.

It was a great night and I am looking forward to next time I can run a big event.

Enjoy the pics, and If this works I will add more posts mobile.