STEP 1: Gather your materials.
Here we can see various materials I used for the stem of the fountain. All of the wooden pieces are from a local craft store, the base is a 40mm plastic base. You can see most of the wooden piece have a hole already in them which already size up to the peg. Some of the holes will need resized so the peg will fit smoothly into their center. This is an easy fix with a Dremmel. Just line up the peg to the center and drill to widen the hole.

STEP 2: Lining them up.
BEFORE we glue, we line up everything to make sure they fit properly. I wanted a special use for this fountain (you will see later), so the peg fits directly thru the rest of the fountain. Its a semi-snug fit.
We begin gluing the bottom pieces together and by now you can see everything else lines up. Remove the peg and glue all the other pieces together using PVA glue or Super glue (I prefer Zap-A-Gap). Remember, the peg is removed during this process, we want the peg to be free from them stem for a purpose.

This is the stem complete, not yet painted, but the basic of the shape.
STEP 3: Adding decor.
Now a plain stem is nice, but adding some detail and decor would be nice. Here is the process I used.
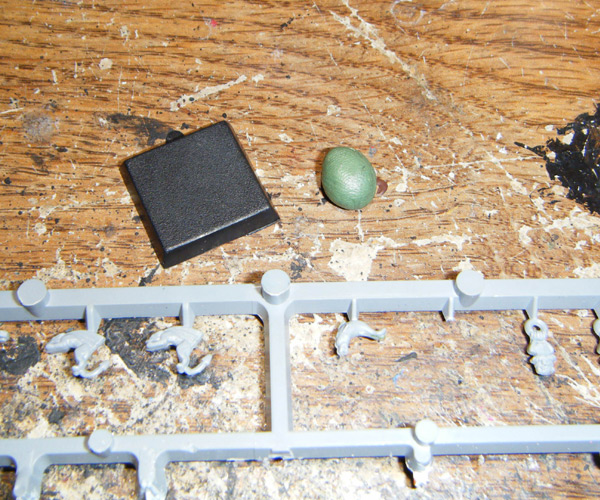
Materials: a simple flat surface like this small base from Games Workshop. Green stuff (this ball is premade for the picture). Any object you may want to use for the decor (Just so happen to have this Games Workshop sprue from an old Empire Cannon).
Add the ball of green stuff to the base. We want to wait about 15 minutes or longer for the green stuff to get a bit more solid (like we did for the custom bases a while back).


And mold complete! Now we let this sit to dry overnight until it gets hard.

STEP 4: Adding the decor
This is the basic way I added the decor to the fountain stem using the stem, green stuff, and the mold we just made. First you take some green stuff and place it where you want to decor. wait a bit for it to set (about 15 min or longer).

Next drop a bit of water into the mold area and press the mold onto the gob of green stuff.

Unfortunately the molding with the lion head shown here did not work. But was able to use the picture to show how I made the dolphins for the top part. And because I was in a rush, I forgot to take a finished picture of the stem with all of its decor. But if you look up two pictures, that is the final stem piece.
Tomorrow I will cover the creation of the fountain, which will also have more pictures of the stem (since they go together).
No comments:
Post a Comment